The GRIZ Sextant

The GRIZ Sextant is an expression of my love of 80s computers. But what computers exactly? There is a multitude of wild machines from the 80s to choose from but in the end, I ended up choosing a somewhat surprising choice as my design inspiration, the GRID Compass.
It is difficult to properly describe my fascination with 80s computers. As a child of the 90s I did not grow up with Commodore or Tandy machines and did not pick up a mouse and keyboard until the Windows 95 era. So why the obsession with machines for an era I was not alive to see?
For me personally, there are multiple reasons. First, as someone who works in engineering and product design, I am fascinated by the design effort that went into machines before the era of computer aided design. I do not know what I would do without Solidworks in my day-to-day engineering life so the thought of designing a complex piece of consumer electronics without CAD is both awe inspiring and horrifying. Second, like many in the Cyberdeck community I am drawn to the styling’s of 80s products.
Petrolicious on Youtube features a video about the Lamborghini Countach and claims it comes from a time ‘When Outrageous was Possible’. I think this same sentiment can be applied to the computers of the 1980s.

The period seemed to be like the wild west for computer designs, sleek and simple modern design stylings had yet to be decided upon and designers often took bold and unusual steps to help their machines stand out among the rest. What this ended up giving us is a collection of machines who are bold and beautiful in their own ‘garish’ way. Finally, the 1980s was a time shortly before well, me. A time when my older siblings ran around as teenagers, my grandparents were in their prime, and my parents were just becoming acquainted with each other. I think artifacts from this time periods help me better understand the story of my family.

As I have rather wordily explained above, I like 80s computers. I also like DIY electronics projects. I have built multiple gaming machines such as portable consoles and mini arcade cabinets in the past using the Raspberry Pi. As a mechanical engineer, my interaction with the Raspberry Pi was often surface level, not going much further than setting up emulators and tweaking config files.
As I built these projects though I often found myself wanting to dive deeper into the world of Raspberry Pi but was stymied by the need to set up what was essentially an entire computer set up every time I wanted to toy with one. So, my plans for a Raspberry pi laptop were born.
Combine the Pi with a display, keyboard, and power supply and give myself a simple portable platform to begin to learn on. After a few years of failed attempts, I eventually discovered the Cayberdeck community and learned I was far from the first person to have this idea. I looked through all the amazing work done by the community and it finally gave me the inspiration I needed to build my own machine.

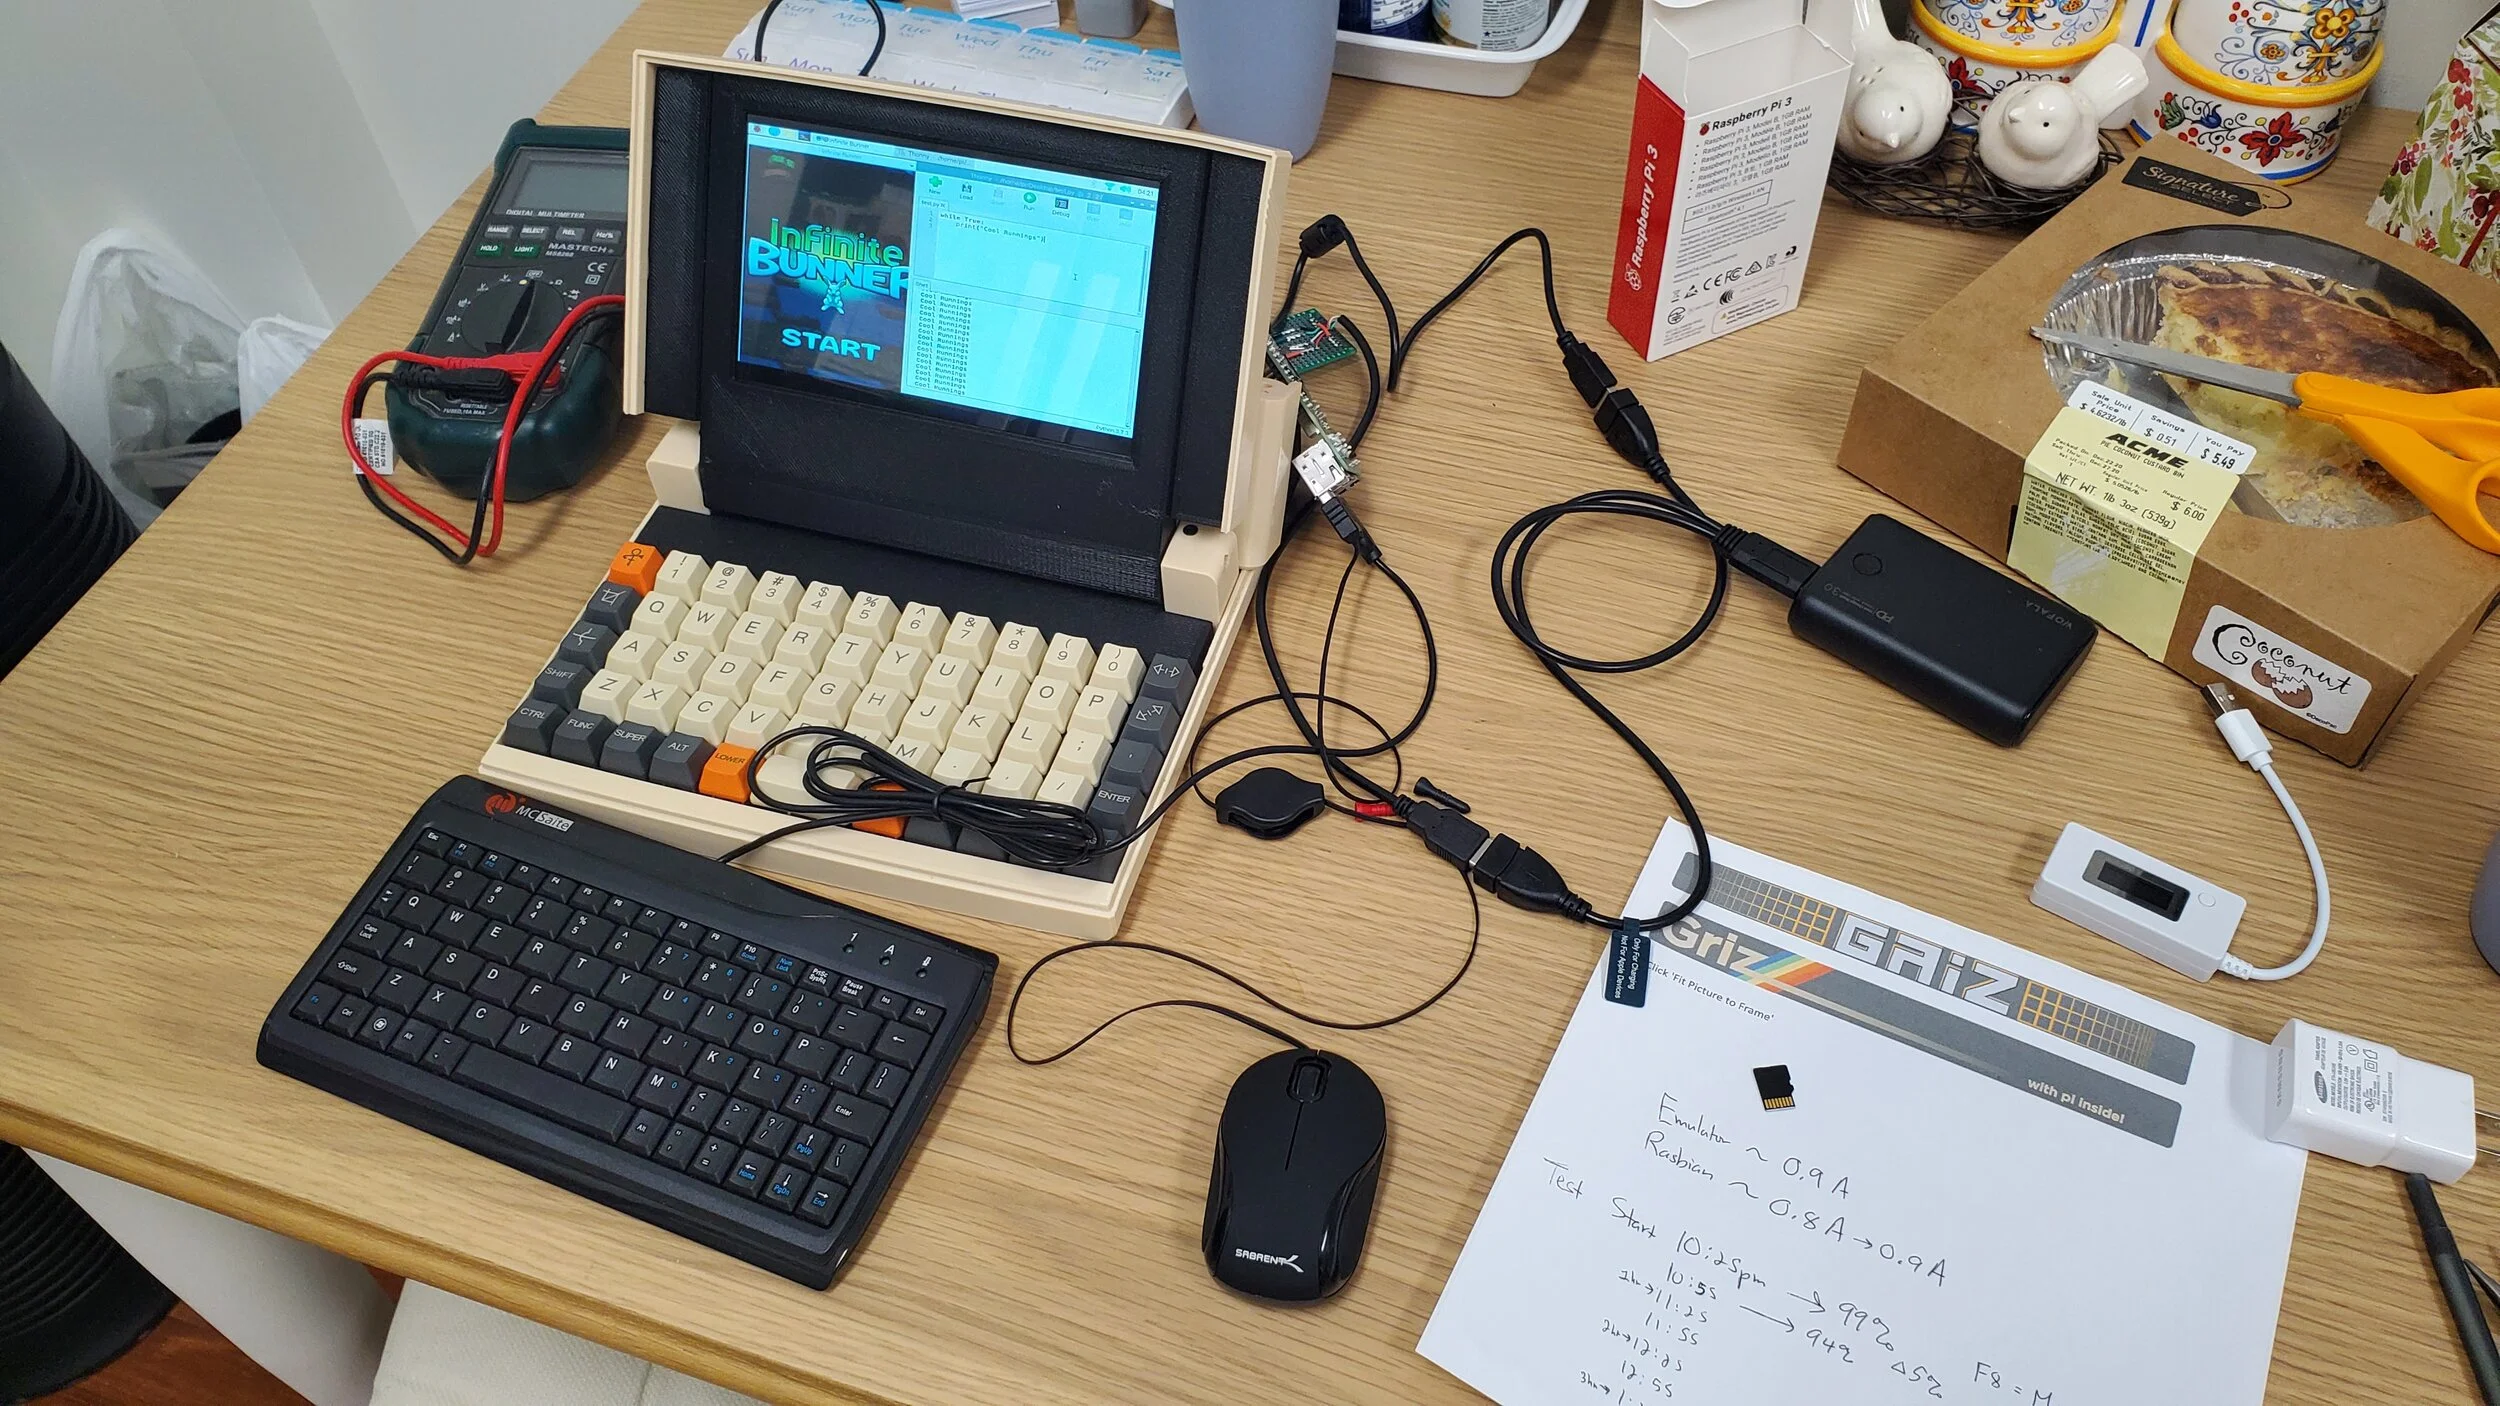
The GRID Compass is not the most outlandish looking machine. In fact, it looks surprisingly sleek and modern. I do not need to go much into details, but the GRID Compass was quite a trailblazing machine for 1982. It is arguably the first clamshell laptop design and features a slew of high-end feature befitting it outrageous price tag. The GRID Compass seems almost anachronistic, a product of both the bold outrageous 80s and the subdued sleek present. It was this exact reason I chose it as the inspiration for my design. As a bonus, the form factor of the GRID lent itself well to recreation by 3D printing.
Its parts break up in a logical and straightforward manner greatly simplifying the design and printing process. As a quick aside, while the GRID Compass is a heavy inspiration for this project, this is not a replica. I wanted my design to forge it’s own identity so for fun I threw in other smaller design flourishes to pay homage to other titans of 80s computing such as the Commodore 64.


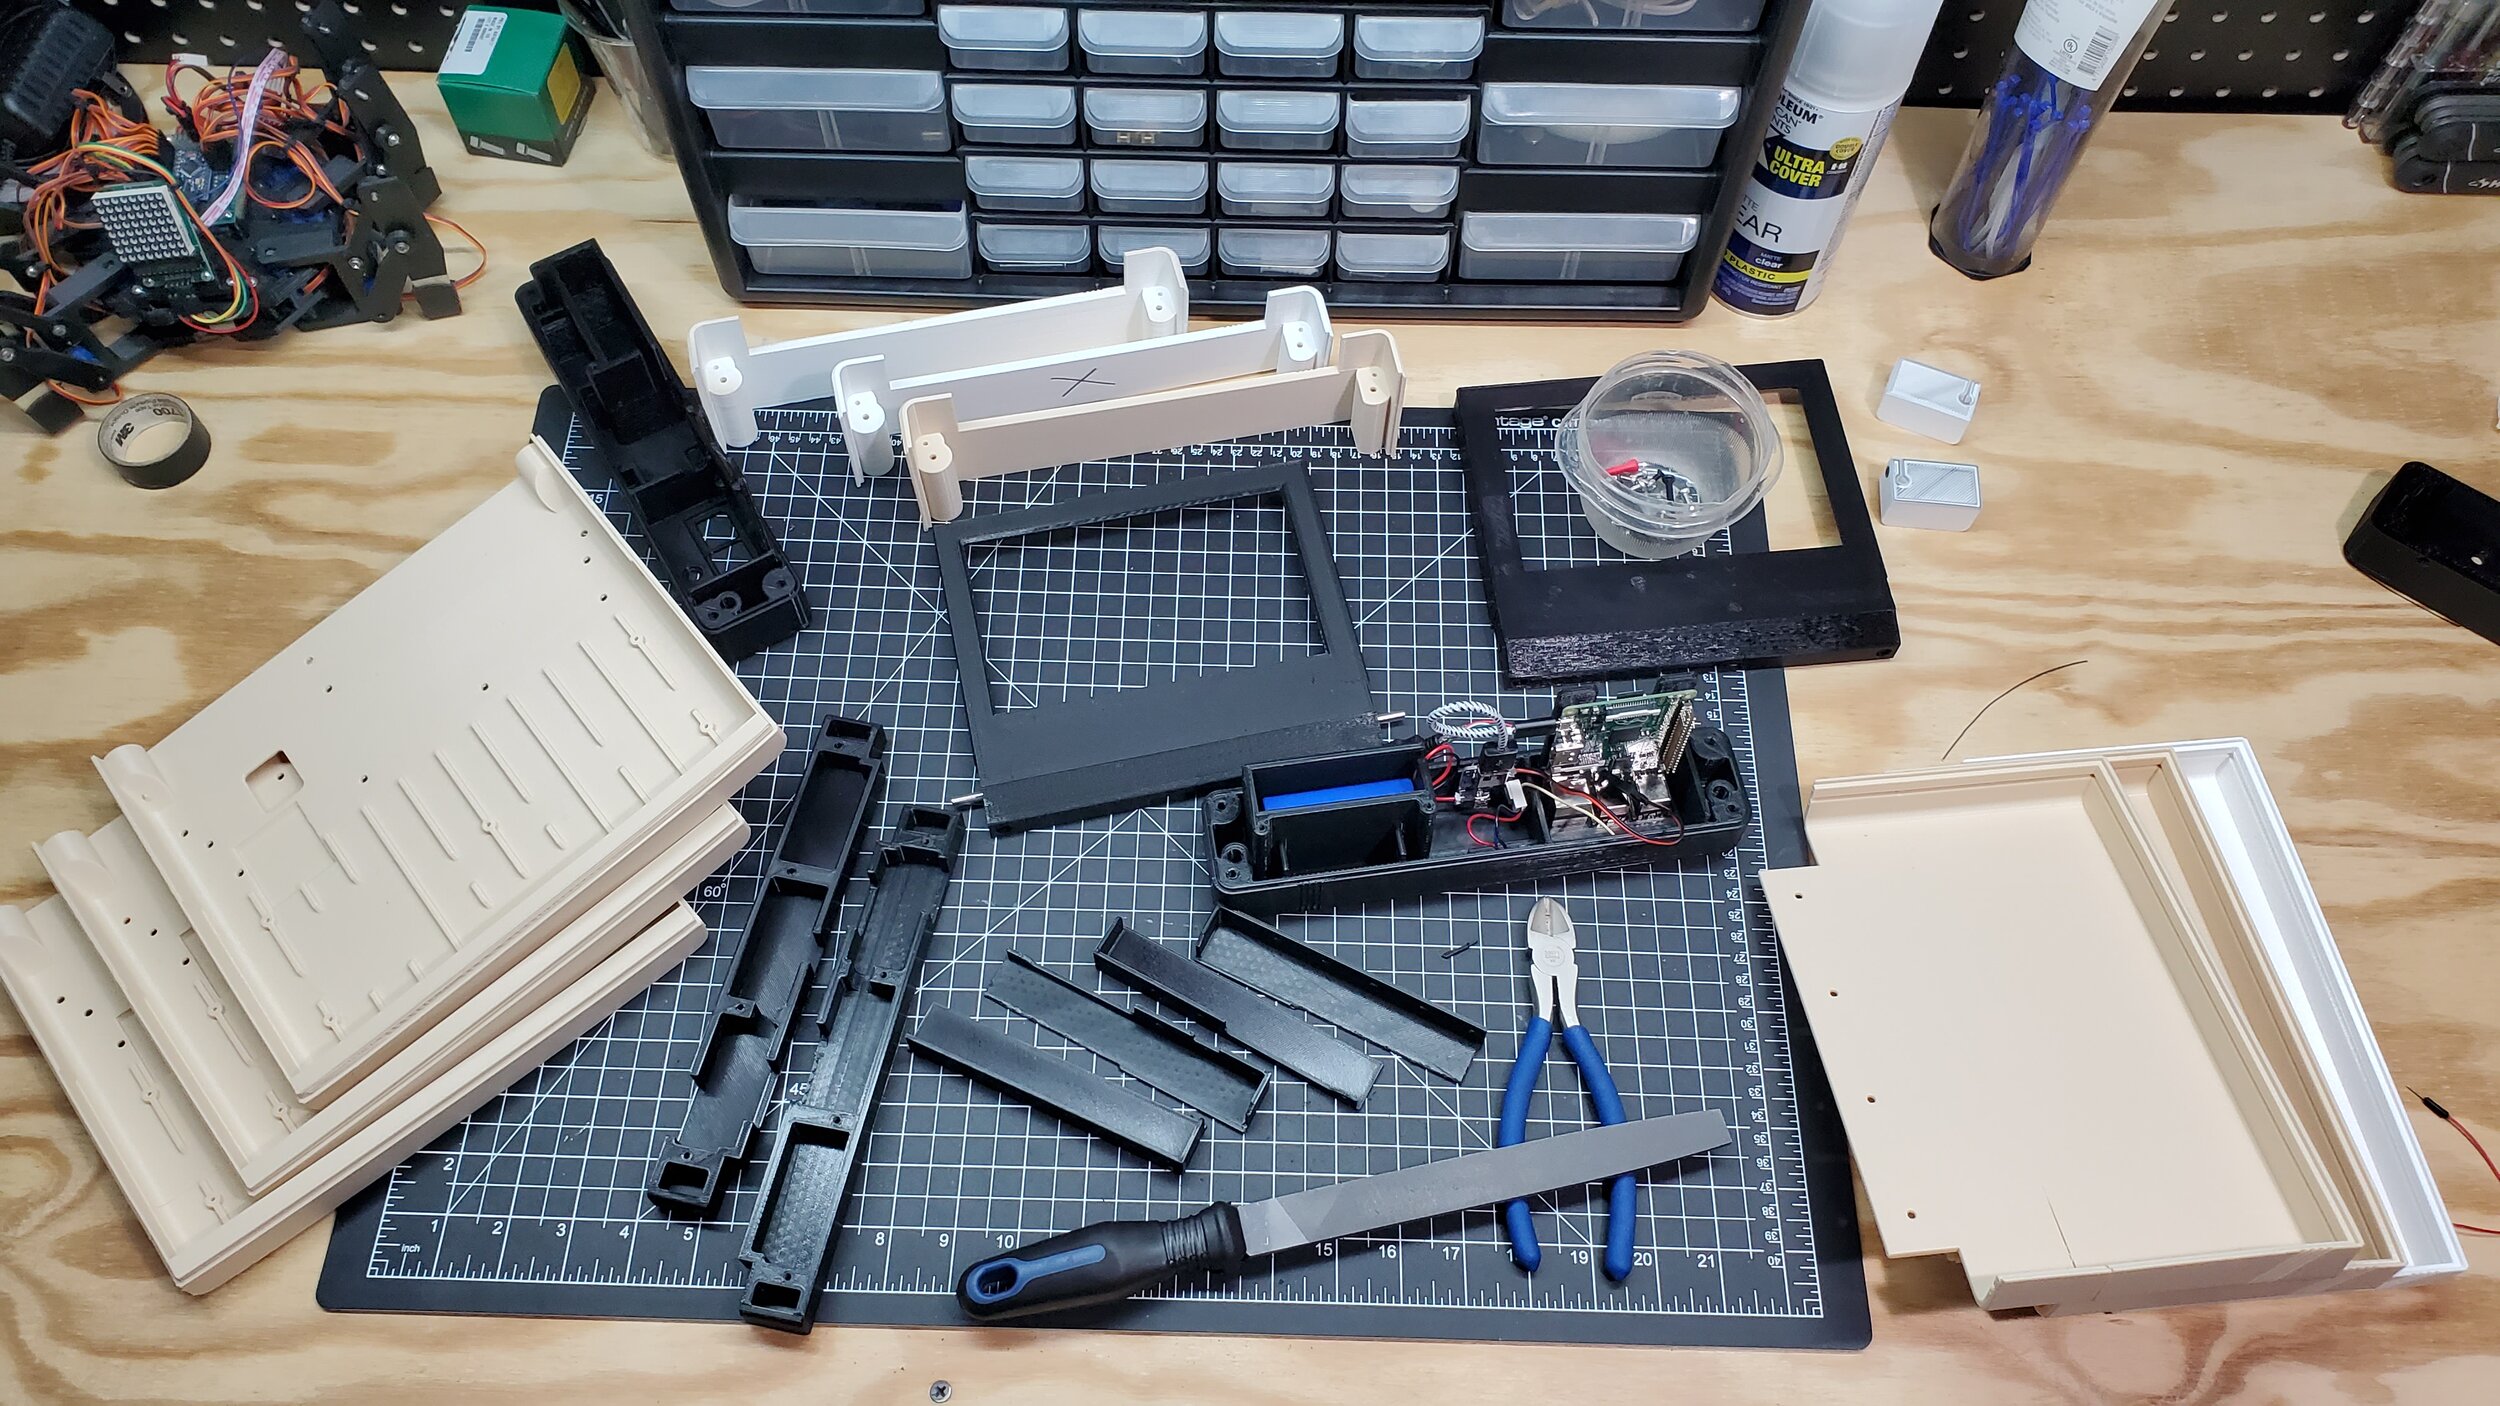
One of the guiding principles I like to apply in my designs is KISS, Keep It Simple Stupid. I am a lazy person by nature, so I like to try to and cut down on build effort wherever possible. For the design of the GRIZ I applied KISS in several areas. First, for the 3D printed parts, I took pains to keep support material to a minimum.
I went to great lengths to keep the dimensions of the unit small enough so that the casework parts could fit on a standard 8x8 build platform without needing to be broken up. They fit by a hair in some cases, but they do fit. Second, I pushed myself to simplify the assembly of this unit as much as possible. Part count is kept as low as possible and only three distinct types of screws are needed.
In the end, once the parts are prepared this unit can be assembly in under an hour. Finally, when picking parts I tried to reduce the need for modification and rework. Wherever possible I chose interconnects that could be accomplished with OTS cables reducing the need to splice and solder.
Continued reading:
Many challenges were encountered during this build. Selecting a mechanical keyboard turned out to be an early issue. I decided early on that I wanted a 50% mechanical keyboard; 40% keyboards were somewhat easier to find but I wanted a dedicated number row.
I eventually decided on the JJ50 from KPrepublic and had to wait over a month for it to arrive from overseas. When it finally arrived, and I was able to install it I was horrified to find it was barely functional with a Raspberry Pi! It would work perfectly with my desktop but when installed in the system it would constantly miss or repeat key presses.
After days of stress, I was able to track the problem down to the LED library controlling the keyboard underlighting. As these lights were not needed, I figured out how to disable the library in the firmware and the issue went away.
3D printing, my first set of parts were printed by a friend and subsequently lost in the mail for a month. My attempts to print them at home lead to excessive part warping until I eventually bought an enclosure for my machine and turned off the cooling fan during printing.
Finally, an ongoing issue in this design is the power supply. I designed in a 4400mAh battery boosted by the Adafruit Powerboost 1000c. This is a power solution I have used in the past but given the increased power demands of newer Raspberry Pi as well as the 7inch display the PB1000c is having trouble keeping up.
Currently the system is limited to working with a Raspberry Pi 2 Model B instead of the Raspberry Pi 3 Model B I intended. I am currently doing some redesigns to switch the battery to a 10000mAh power bank that I have successfully tested outside of the unit with the Pi 3.
I plan on adding a new power circuit to the system allowing the user to switch between battery and wall power. Also, I should note that there is currently no sound system designed into the GRIZ. I have components picked and a spot selected for them but I wanted to get moving on a preliminary build asap and decided that sound could wait until the round 2 build.
In the end I am very happy with the result. The design is straightforward and easy to reproduce. I managed to remove visible fasteners from all surfaces except for the bottom and rear (but keep this a secret, that slick little logo on the outside of the unit may or may not be hiding some fasteners).

The laptop itself is a joy to use and the keyboard feels great, the 7” HD display offers more than enough resolution to do work on. Once I can work the new power bank into the design the system should be able to run a Raspberry Pi 3 for 5+ hours on a single charge. Currently I have not released files or instructions for this build. However, that will definitely change in the future.
One of the most important aspects to me for DIY builds like this is that I share my designs and allow others to build them. Collaborating on designs like this allows me to improve my work by letting others look under the hood and make their own tweaks and improvements.
I’m always eager to see how people take my designs and make them their own. I am currently logging this build on my meager YT channel Behind Schedule and Over Budget it is currently my best way to communicate any project updates and releases. Anyone who is interested is welcomed to follow along with the fun and frustration.
